If you are an iPhone user then you must be well introduced with the struggle of limited iCloud storage which you are provided for free. Given that, you may want to give into Google Photos to store all of your photos and lead an easy access and organisation. If it is true then follow through this article to know how to backup iPhone and iPad photos to Google Photos.
What to Expect While Moving Photos and Videos from iPhone/iPad to Google Photos?
Apple offers an iCloud storage space of upto 5GB to store your data for free but to continue fitting more of your photos and videos, you must upgrade to the premium iCloud storage plan which starts at $0.99 per month and offers 50GB.
While you may be ready to pay the bucks to accommodate your photos and videos, know that you can always go to Google Photos, a reliable alternative for you to not only store your entire stock of photos and videos but also grip a control over its management.
Before moving to the steps to move photos from iPhone to Google Photos, there are a few quick check points to remember to while you backup iPhone and iPad photos to Google Photos:
- When you upload your photos and videos to Google Photos, they get automatically compressed to keep from consuming space.
- You can upload the photos and videos in original quality that will count under the limited free cloud storage plan offered by Google. This plan offers 15GB of free storage and if you wish to use more storage, know that this plan starts at $1.99 per month for 100GB.
Read Also: Best Duplicate Photo Finder App for Mac
A Step-By-Step Guide to Backup iPhone Photos to Google Photos
If your cloud storage is exhausted with the heavy piles of photo and video albums and you do not wish to be charged bucks every month to store them to iCloud, then follow these steps that will help you get started with Google Photos to store your data.
Here is how to move photos and videos from iPhone to Google Photos:
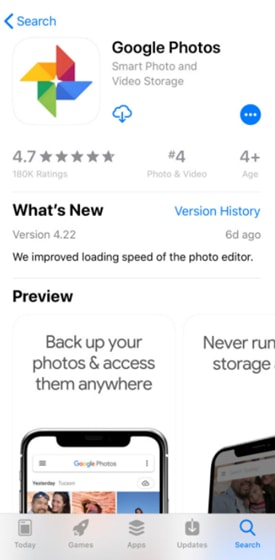
Step 1: Turn to Apple App Store and search Google Photos to install it on your iPhone.

Step 2: Enter and Google account and sign in.
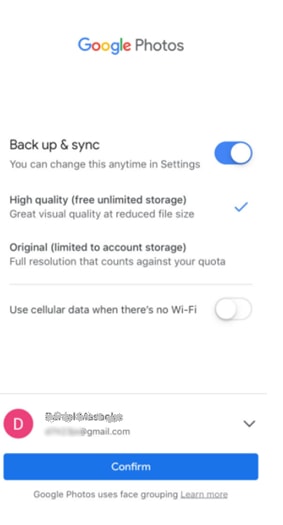
Step 3: Once you are signed into Google Photos, go to ‘Backup & Sync’ options in ‘Settings’ and turn it on.

Step 4: You will see upload size options where you will be asked to select High quality or Original quality to backup your photos and videos to. Select High quality which offers free unlimited storage. If you wish to upload photos in original quality, make sure to check the available storage first.
Step 5: You will come across an option to use mobile data when there is no Wi-Fi available. If you do not want the backup of your photos and videos to be hampered due to the loss of Wi-Fi, turn the toggle on.
Step 6: Once you have selected your options, Click on ‘Confirm’ so get started with backup.
Read Also: Best PhotoBucket Alternatives
Free Your iCloud Storage by Using Google Photos Unlimited Free Storage
So that was it on how to back up your iPhone/iPad photos to Google Photos. While you come across the red flags of storing loads of photos and videos, using free unlimited storage is the best deal out there to play safe. What is your say in this? Does it make any difference to you? Spill everything in the comment box below.


Comments ( 2 )