What is Modern Setup Host and How to Fix It?
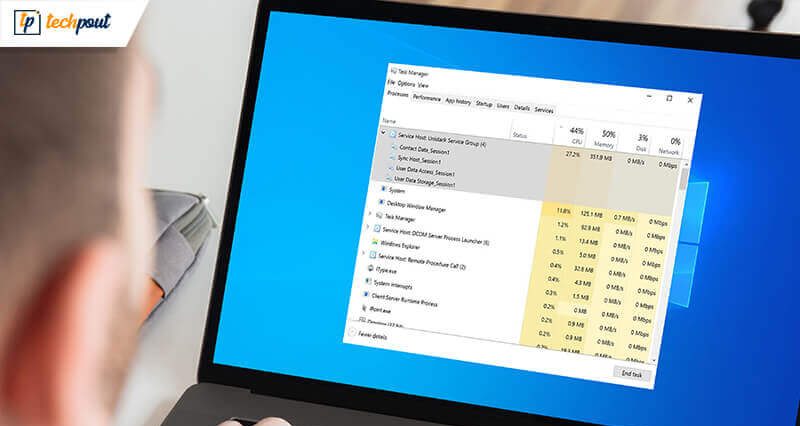
Do you have a slow computer and the Task Manager shows you a process called Modern Setup Host highly consuming your system’s CPU and Memory? You might also come across an error message like “Modern Setup Host has stopped functioning” while trying to upgrade to Windows 10 from Windows 7.
Before we dig deeper into the topic in this post, we will first brief you up on what exactly is this process? You need to comprehend its function and then be informed about the fixes when this error leads to high CPU usage by the Modern setup host process.
What is Modern Setup Host?
It is basically an installer that is located in a self-extracting archive within the $Windows.BTSources folder. In other words, this is a self-extracting archive and installer that triggers system updates. It circumstantially shows up on systems that runs the Windows beta system version (Windows Technical Preview).
This process appears to be running in the background of computers when it is installing an update or is running the installation setup file to upgrade a computer from Windows 7 to Windows 10. The Modern setup host itself functions within the context of the parent Windowsstoresetup.exe (which is directly executed by Microsoft Windows Update).
Thus, users can see an error when they are trying to upgrade to Windows 10 but they won’t b able to complete the upgradation process without fixing this error.
Troubleshoot methods to fix Modern Setup Host error:
Users often encounter two chief problems that are as follows:
- Heavy CPU and memory consumption by Modern setup host
- The Modern setup host stops functioning.
Generally, this issue rises prevalently when Windows Update issues occur. You can try the below-suggested fixes to resolve the issues mentioned above and also to optimize the speed of the Windows PC when there is 100% disk usage.
1. Use Windows Update Troubleshooter Tool
The Windows Update Troubleshooter is a built-in tool on Windows 10. The below steps can guide you to run the tool:
- Go to the Search bar located at the bottom left corner beside the Start menu on your computer screen.
- Search for the Troubleshooter tool here by typing “Troubleshoot” and select it.
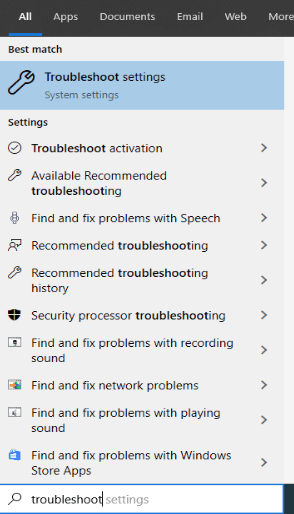
- Once the tool window opens, click on the Windows Update section and further run the application by clicking on the ‘Run the troubleshooter’ button.
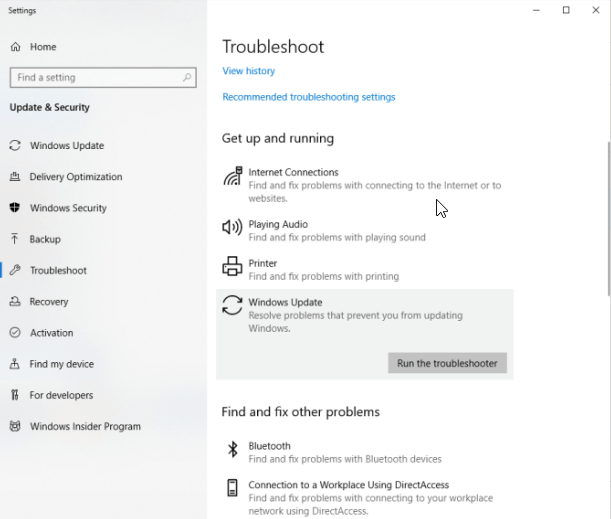
- Let the tool detect the problems and rectify them.
- You can further follow the pop-up instructions to finish the process of resolving the issue.
If you are still on Windows 7 or 8, then you can use the below steps to solve the problem arising due to the Modern setup host.
- You need to first download and install the troubleshooter program from the Microsoft website.
- Then, the following process is similar to the above-described steps from the Windows 10 segment.
2. Use DISM Tool
If the Windows Update process has gone corrupted, then it may give rise to this sort of error which can be resolved effortlessly with the Deployment Image Servicing and Management (DISM) tool of Windows 10 as per the below-given steps.
- Open Command Prompt by typing “cmd” in the Search bar located beside the Start menu.
- Use the right-click option on the Command Prompt and choose the ‘Run as Administrator’ option.
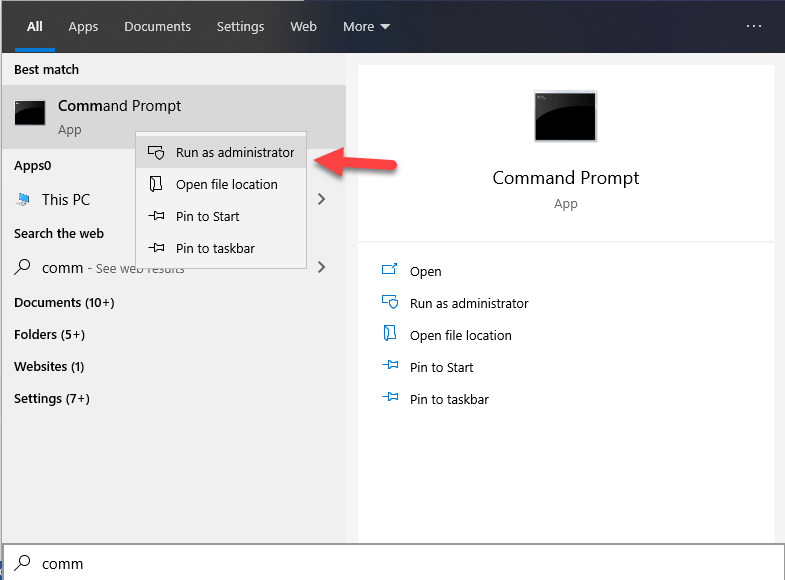
- Permit by clicking ‘Yes’ if asked for permission requests.
- Further, run the following commands:
DISM.exe /Online /Cleanup-image /Scanhealth
DISM.exe /Online /Cleanup-image /Checkhealth
DISM.exe /Online /Cleanup-image /Restorehealth.
Once the scanning process is complete, verify if the problem has resolved or it persists.
3. Perform Clean Boot
Sometimes, high CPU usage due to Modern setup host can occur if the Windows Update fails due to interferences from background programs. A clean boot can be performed to deal with this problem as per the following steps:
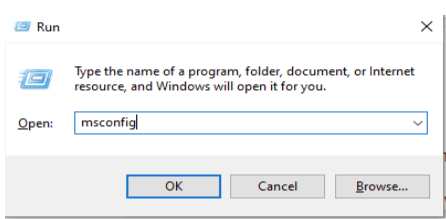
- Open the Run dialog box by pressing Win key + R key.
- Type “msconfig” to open the System Configuration window.
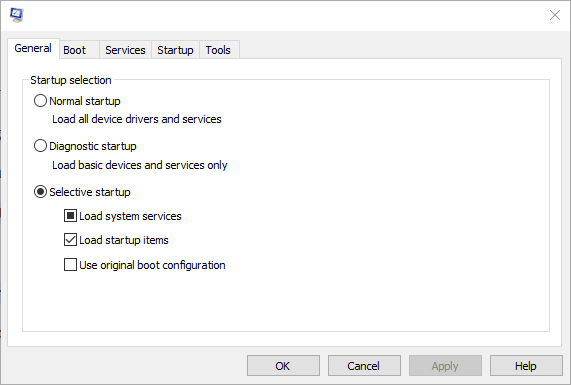
- Under the General tab of the System Configuration window, uncheck the ‘Load startup items’ box.
- Under the Services tab, check the box which says ‘Hide all Microsoft services’ and then click on the ‘Disable all’ radio button.
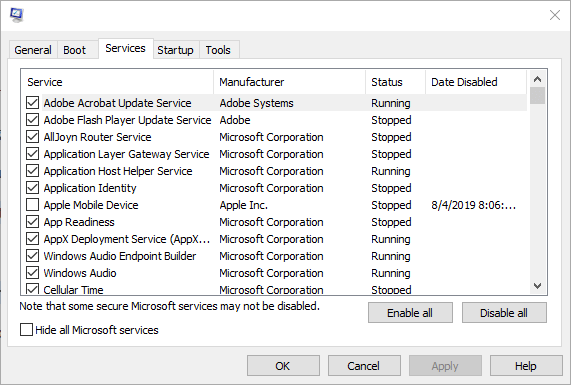
- Then, switch to the Startup tab and open Task Manager by clicking on it.
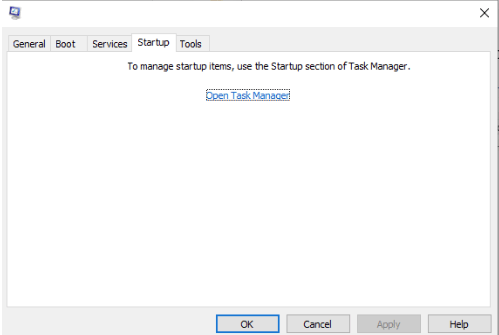
- Now, on the Startup tab of Task Manager, every startup item that shows up has to be disabled by clicking right on the items and choosing the ‘Disable’ option.

- Then, move back to the Startup tab of the System Configuration window and select the ‘OK’ option.
- Finally, restart your computer to see if the problem still persists or has resolved.
4. Use the Ideal Default System Language
Windows Update may encounter a problem if the language of the system is not the same as that of the default language of the system UI. Windows 10 users can check what is the default system language by the following steps:
- Go to the Start menu and open the Command Prompt window by typing “cmd” and select the ‘Run as Administrator’ option by utilizing the right-click option.
- Enter the following command and press the Enter key to see the default system UI language:
dism /online /get-intl
To check the setup system language, use the below steps:
- Go to the Windows Settings.
- Select the Time & Language option and then click on the Language segment.
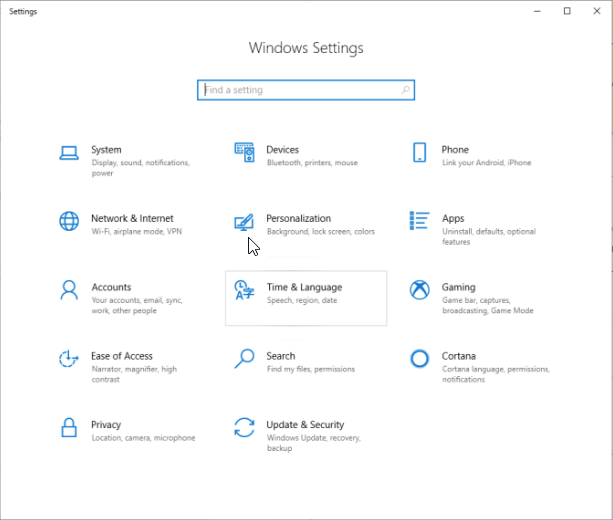
- This should display the language on the right-hand side pane which is currently set up on your computer. If you notice a contradiction here, then change it to match the default system UI language. If this doesn’t resolve the issue, then use the following method to solve the Modern setup host high disk usage issue.

5. Empty the Software Distribution Folder
The software distribution folder is responsible for storing all the important temporary files required for Windows Update. However, if too many files occupy the folder, then it may create an interference with the Windows Update. To remove unnecessary files, you can try to utilize the following steps:
- Go to the Run dialog box by holding and pressing together the Windows key + R key.
- Using the below path, go to the respective location and then select all the files and delete them from the folder.
C:\Windows\SoftwareDistribution\Download
- You might be prompted with an ‘Access Denied’ message. If so, then choose the ‘Do this for all current items’ option and further choose the ‘Continue’ option.
- Further, restart your PC and verify if the problem persists.
6. Disable Windows Update
Finally, if the above fixes did not solve the problem at hand, then you must be wondering what can be further done to resolve the Modern setup host issue.
- Open the Run dialog box and input “services.msc” in the type box to open the Services window.
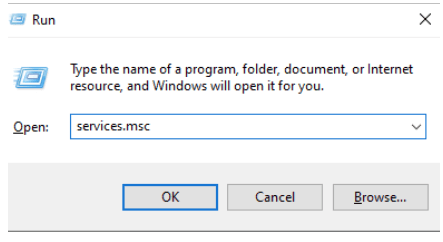
- Here, right-click on the Windows Update to select the ‘Properties’ option.

- Under the General tab, make sure that the Startup type option is set to ‘Disabled.’ Further, you can click on the Stop button.

- Then, go to the Recovery tab and ensure that the First failure option is set as “Take No Action.”

- Apply your changes and get a confirmation of whether the problem has resolved in its entirety.
Lastly, if all the above methodologies did not yield the desired result and the problem persists on your computer, then try to find an ideal driver update software that can automatically scan your system for slowdowns, performance issues and driver-related troubles. The Driver updater utility can detect outdated drivers and replace them by installing the latest drivers on your computer.
Final Thoughts
From this article, you not only acquired knowledge about the Modern setup host process but also had a fair idea on how you can fix the associated problems of high CPU consumption and disk space usage.
