How to Download and Update Logitech M185 Driver
You may dodge annoying problems like the mouse behaving erratically by performing the updated Logitech M185 driver’s download and installation for Windows 11/10. Below is a quick and easy guide to doing it.
A compact wireless mouse brings convenience to both personal and official computer use. One such efficient mouse you may choose is the Logitech M185. However, when using the device, you should ensure that your computer has an appropriate Logitech M185 driver to support its functioning.
If you do not know what a driver is, let us first have a clear understanding of it. A driver is simply software that communicates your commands to the computer in its language, i.e., binary codes. Without the Logitech M185 driver for Windows 11/10, your computer won’t understand your instructions. Hence, you may experience issues like a jumpy mouse.
Therefore, to avoid this and many other problems, this article elucidates the methods to download the Logitech M185 driver, install, and update it. Let us begin with them without any further delay.
Quick and Easy Methods to Download, Install and Update the Logitech M185 Driver
You may apply the following methods you may apply to download the Logitech M185 driver update and install it on Windows 10/11.
Method 1: Download the Update for the Logitech M185 driver from the official website
Logitech’s official website offers all needed drivers for the peripherals manufactured by the company. Below is how to find, download, and install the Logitech M185 driver from there.
- Travel to the official website of Logitech from this link.
- Search for your Logitech M185 mouse.

- Choose your mouse from the search results.
- Expand the Support segment to view all downloads.

- Select Downloads from the left panel, choose your operating system, and click Download Now to get the driver’s installation file.
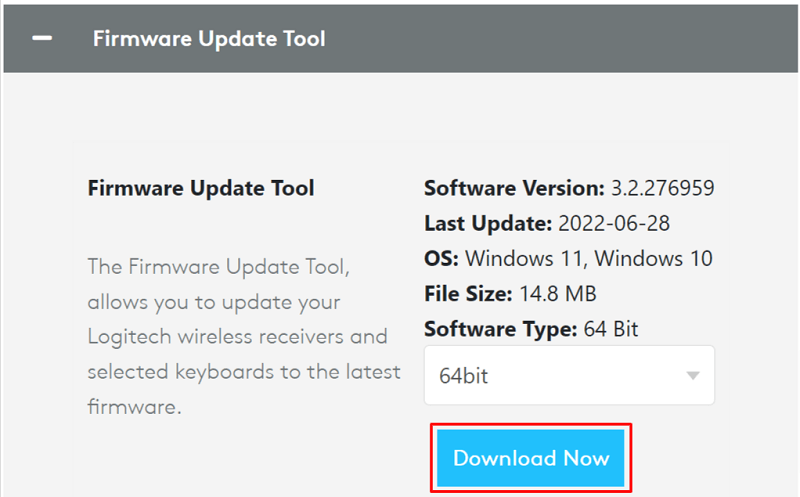
- Click twice on the driver installation file you downloaded above and follow the on-screen directions to complete the driver installation.
Also Read: How to Update Drivers on Windows 11
Method 2: Make Device Manager’s use to download the Logitech M185 driver update
Windows boasts a Device Manager to help you handle all tasks related to drivers like downloading and installing driver updates. Below we share how to use it to download and install the updated Logitech M185 driver on Windows 11/10.
- Find Device Manager and launch it using the search function of your computer.

- Click on the section titled Mice and other pointing software to get its expanded form.
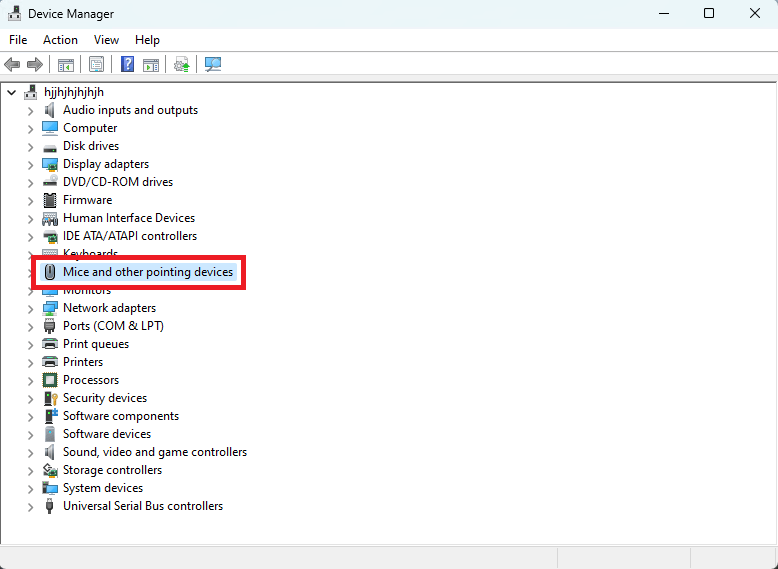
- Right-click on the Logitech M185 mouse and choose Update driver from the options that appear.
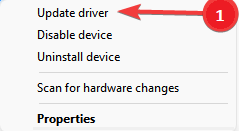
- Search automatically for updated driver software. In Windows 11, this option is available as Search automatically for drivers.
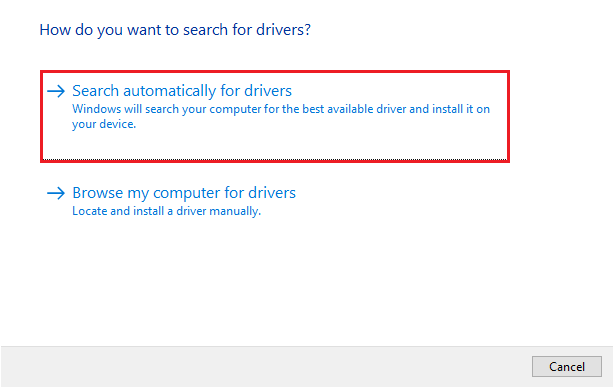
- Wait for the operating system to complete the driver download, installation, and update.
- Restart your computer after completing the above steps.
Also Read: Best Ways to Update Outdated Drivers in Windows
Method 3: Try updating your OS to get the updated driver for the Logitech M185 driver installed
Operating system updates are an excellent way to solve common problems and download the Logitech M185 driver for Windows 10/11. However, it may sometimes be unsuccessful (if the driver updates are released extremely recently). Still, you may follow the directions given below to try installing the driver updates this way.
- You may make use of the Windows+I keyboard command to access the settings panel.
- Choose the setting named Update & Security from the options you get on your screen.
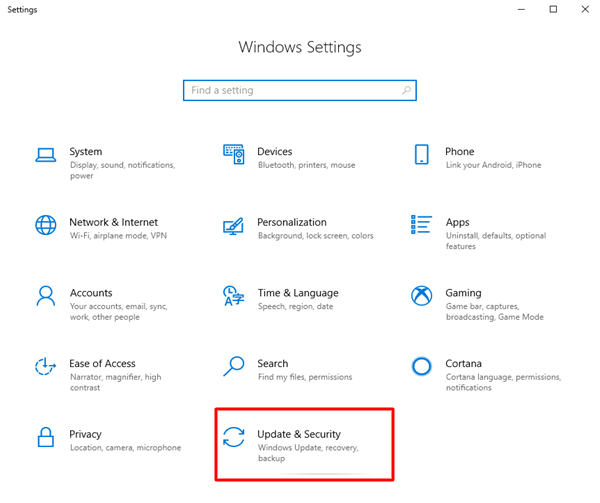
- Let your computer Check for updates.

- Download the recommended update and install the same on your device.
- Once you have completed the above steps, you may restart your computer.
Also Read: How to Update Logitech Mouse Driver In Windows
Method 4: Troubleshoot the hardware and devices
You may choose to perform troubleshooting for hardware and devices if you are facing problems with the Logitech M185 mouse. Running the troubleshooter downloads and installs the necessary driver and solves the problem. Therefore, below we share the step-by-step way to do it.
- Get the settings panel on your screen using the Windows+I shortcut.
- Choose the Update & Security option from the available options.
- Scroll down to the Troubleshoot option in the left panel of your update & security window and select it.
- Find and click on Hardware and devices.
- Select the button to Run the troubleshooter.
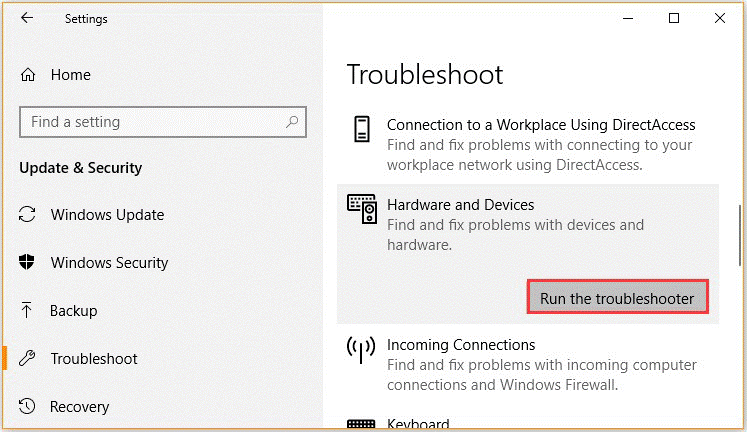
- After completing the troubleshooting process, get your computer restarted.
Method 5: Download and install the Logitech M185 driver automatically (Recommended)
Above, we looked at different manual ways to download the Logitech M185 driver update and install it for Windows 10/11. It may not be a very good idea to update drivers manually if you are a beginner or wish to save time and effort. Therefore, we strongly recommend updating drivers with just a few clicks using an automatic program (for example, Bit Driver Updater).
Bit Driver Updater performs all required driver updates with just a single click. Moreover, driver backup and restoration, scheduling of scans, and acceleration of driver download pace are some of its other amazing features.
Below is the link to download the Bit Driver Updater software and get it installed on your device.
Once you have downloaded and installed the program, you get a list of outdated drivers displayed on the screen within a few seconds of the installation. You may Update All drivers to their newly released version for the best performance.
Bit Driver Updater also boasts an Update Now option if you wish to download the Logitech M185 driver update and install it individually. However, experts always consider it more appropriate for the computer to update all drivers.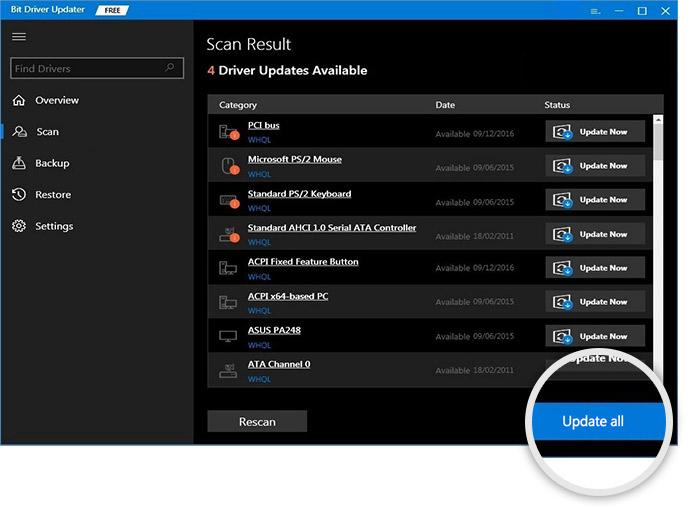
It was all about downloading the Logitech M185 driver for Windows 10/11, installing, and updating it. Now, you may go through the next section to get the answers to some related questions that may come to your mind.
Also Read: Logitech M510 Wireless Mouse Driver
Frequently Asked Questions
Below are the answers to some of the questions users have often asked about downloading and installing the Logitech M185 driver update for Windows 10/11.
Q1. Does Logitech M185 work with Windows 10?
Yes, you will be glad to know that Logitech M185 works with all versions of the Windows operating system above Windows 7, including Windows 10.
Q2. How do I reinstall the Logitech M185 mouse driver?
If for any reason you need to reinstall the driver for your Logitech M185 mouse for Windows 11/10, here are the steps you may follow.
- Open the Device Manager utility on your computer (you may use the option to search for it)
- Click and expand the section named Mice and other pointing devices
- Right-click on the Logitech M185 mouse and Uninstall/Uninstall device
- Delete the driver software for this device
- Choose Action from the Device Manager’s menu bar and scan for hardware changes
- Get your device restarted
Q3. How do I roll back the Logitech M185 driver?
If you find yourself in the need to roll back your Logitech M185 mouse’s driver to the earlier state, you may follow these directions.
- Launch the in-built driver management utility, i.e., Device Manager
- Choose the Mice and other pointing devices
- Pick Properties from the visible menu
- Select Drivers and Roll Back the driver
- Choose any of the given reasons to roll back the driver
- Click OK and allow the process to complete
Logitech M185 Driver Update Downloaded and Installed
This article guided you through how to download and install the updated Logitech M185 driver for Windows 11/10. You may choose the method that suits you the best from the above methods.
However, we suggest downloading, installing, and updating the driver automatically through Bit Driver Updater if you want to do it quickly and easily. And you may mention other better methods you know to download and install driver updates in the comments section.

