New to Mac? Six Tricks macOS Beginners Should Know
MacBooks are better known than ever before, attracting more and more users to switch from Windows to macOS. If you are new to macOS, you may have difficulty getting hang of it, so you need to take in some Mac tricks to better master the Mac machine you newly bought. To enable you to do things easier with the new Mac, we have already offered a list of tricks and tips to help you out!
Six Must-Know Tricks for macOS Beginners
1. Right Click on Mac
If you have been using Windows for years, you may find it easy to bring up the contextual menu by initiating a right-click through the direct right-click button. However, performing right-click on Mac seems to be more complicated because both the Mac built-in Trackpad and the Apple Magic Mouse have no secondary button indicating the right-click or the left click.
To right-click on Mac, you can do some easy settings on your Magic Mouse and Trackpad, or just use the Mac keyboard:
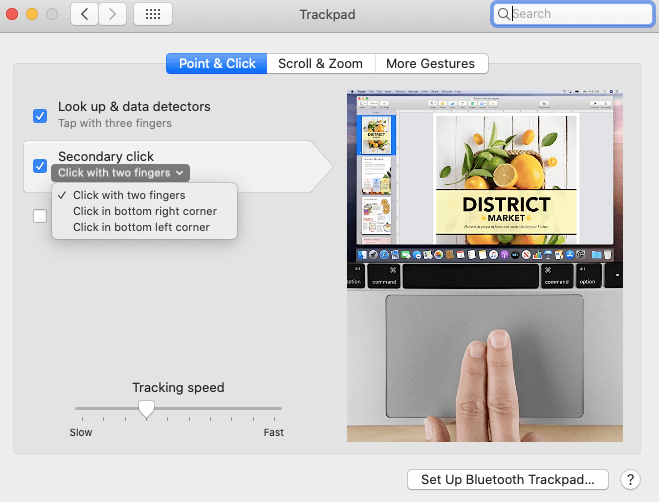
For enabling right-click on macOS using the Magic Mouse or the Mac Trackpad, just navigate to the Apple icon menu > System Preferences, and then select Trackpad or Mouse. In the pop-up Trackpad or Mouse window, check the secondary click option under the Point & Click tab. Then, you can set up your Magic Mouse or Trackpad to enable the right-click function according to your preferences.
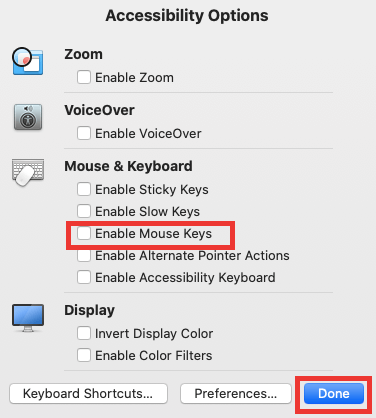
For conducting right-click on macOS with the Mac keyboard, you can take help from the Accessibility Options function except for the Control + single click. First, you need to bring up the Accessibility Options window by pressing the Option + Command + F5 key shortcuts. Then, tick the checkbox in front of the Enable Mouse Keys option under Mouse & Keyboard and tap Done. Finally, press the Function + Control + I key combination to right-click in your selected section on Mac.
Also Read: How to Record a FaceTime Call on iPhone and Mac
2. Install Apps on Mac
Just like Windows, macOS also offers a variety of applications to improve your user experiences, including FaceTime, Calendar, Videos, Maps, Music, Siri, and to name a few.
When getting a new Mac, you inevitably need to carry out app installations to meet your work or play needs. In this instance, the Mac App Store comes in handy. To open App Store, just click the Apple logo from the top menu and then pick App Store from the drop-down list. Now, you can input the app name you want to download in the search box after a successful log-in.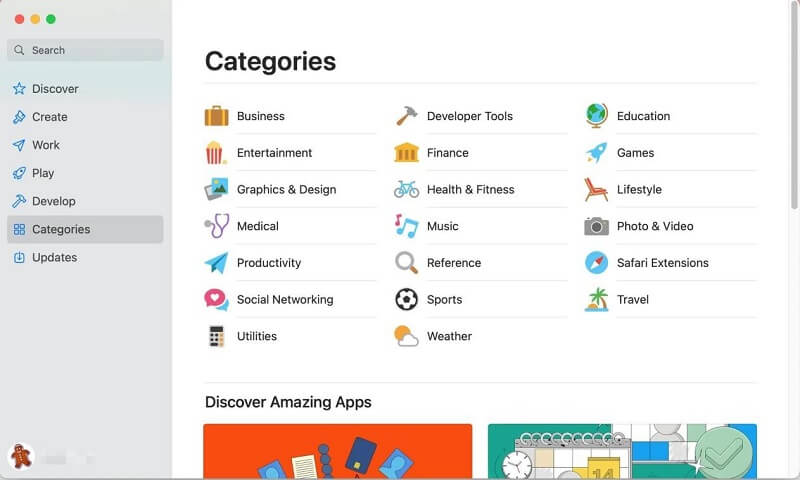
Alternatively, you can also download and install the desired application from its official web if this program is not available on Apple Store, but you need to allow apps downloaded from App Store and identified developers first by going to the Apple Menu > System Preferences > Security & Privacy > the General tab.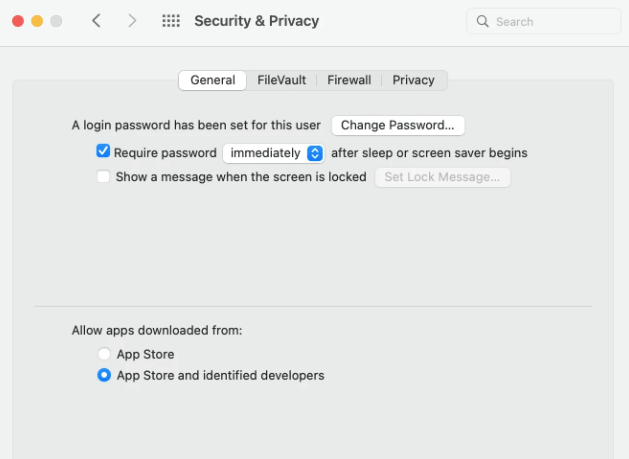
3. Take a Screenshot on Mac
Whether you’re editing a working document or chatting with a colleague through social programs, you’ll need screenshots sometimes. Hence, learning to capture screens is of great necessity. To quickly take a screenshot on Mac, here are some hotkeys you can use:
Command + Shift + 3: Implement a full screen capture on Mac.
Command + Shift + 4: Do a selected part capture on Mac.
Command + Shift + 4 + Space: Capture a screen of a single window or menu.
Also Read: How to Move Files on Mac – Complete Guide
4. Free up Memory on Mac
Random Access Memory (RAM for short) is a small amount of Mac memory that supplies storage for different ongoing system processes and running programs. Thus, if you are running a lot of programs or system processes at the same time, the Mac memory will become insufficient or worn out soon, which will lead to your MacBook being sluggish or frozen.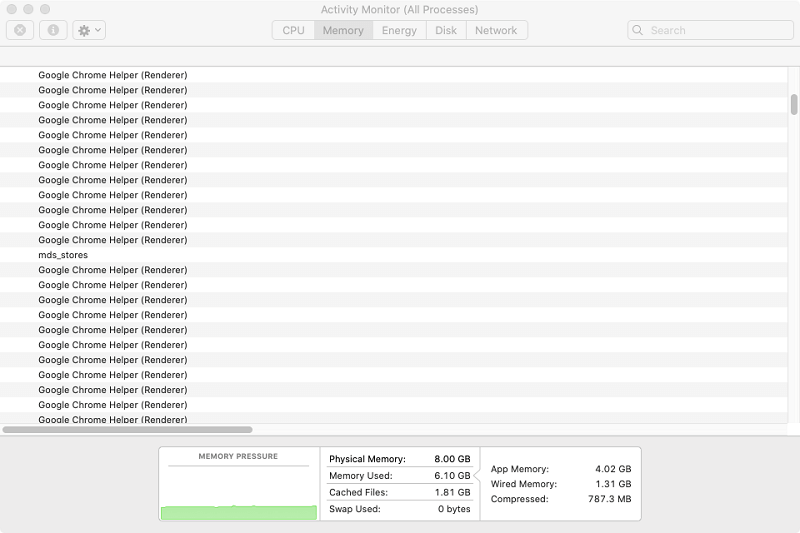
Under such a case, the Mac may run slower than before and always gives a reaction to you after a long time. So, is there any way to improve Mac performance by freeing up memory on Mac? Yes, of course. There are some workable steps you can take to reduce RAM usage.
– Close useless memory-consuming programs.
– Quit useless app windows and web browser tabs.
– Perform software updates.
– Tidy up Mac desktop.
– Clear login items.
5. Select Multiple Files on Mac
The Finder program is the default file manager on Mac, enabling Mac users to proceed with the file selection, viewing, or editing in an easy way. Generally speaking, you are no stranger to picking a single file in an open folder in Finder, but for multiple files, do you know how to select them simultaneously or at once? To help you figure out how to select multiple files on Mac, we have concluded some easy ways.
– Selecting multiple contiguous files in a Mac folder, simply open the Finder tool to locate the files you want to choose. Then, click the first file in the folder, press and hold down the Shift key, and click the last file listed in the folder app.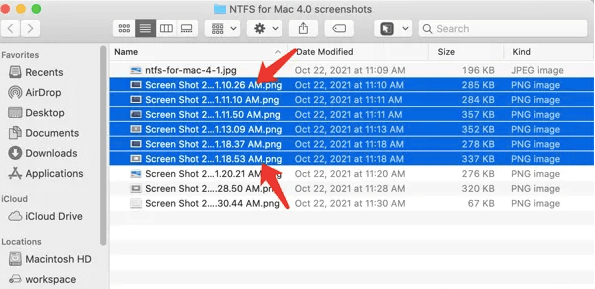
– Selecting multiple non-adjacent files in a Mac folder, just locate and find the files you need in the Mac folder first. Then, choose the first file with a single click. Next, press and hold down the Command key while doing a single click on all the discontinuous files you need one by one.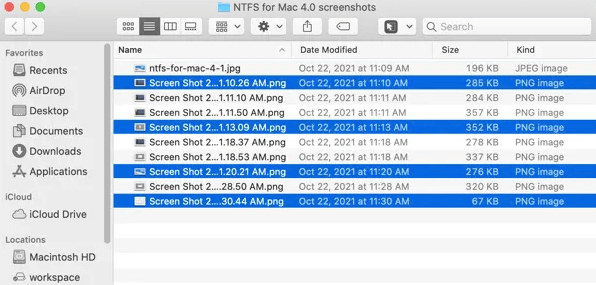
– Selecting all files on Mac, you can use the Command + A key shortcut to quickly get all target files selected. In addition, you can also pick all target files in a Finder folder by moving to the Edit tab in the Finder menu bar > Select All to achieve your goal.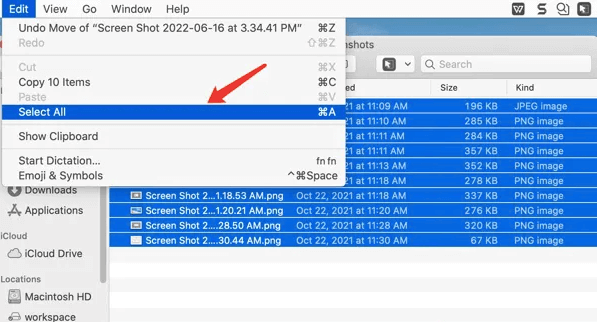
6. Force Quit Programs on Mac
If an app you are using becomes unresponsive for a while, affecting the normal use of the Mac machine, what you need to do first is try to force quit the app instead of your Mac. First, you can open the Force Quit Applications window by using the Command + Option + Esc hotkeys. You can also go to the Apple menu > Force Quit to open this window. Then, you will see all the applications you are currently running listed in the Force Quit window. Finally, find the app you need to close and tap Force Quit to make it turn down.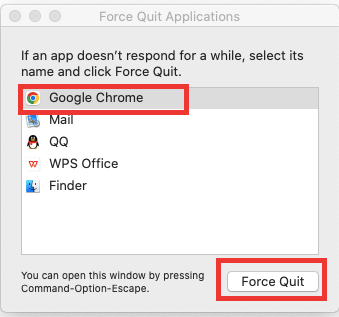
Also Read: How to Clear Storage on iPhone to Free Up the Space
Wrapping It up
It takes time for Mac beginners to get used to macOS when getting a new Mac for the first time. Hopefully, the above-mentioned tricks are useful to you to some extent and can have a certain contribution to you in the fast grasp of your new Mac computer.
